Manual XCP-ng installation on OVHCloud/SoYouStart Server
This guide is more to serve as extra information addition for the normal setup documentation to include OVH specific quirks
https://xcp-ng.org/docs/install.html
Prerequisites
- OVH, OVHCloud or SoYouStart server that has IPMIv1 with iKVM or IPMIv2 with iKVM capability
- Java installed to use KVM on either Windows or Linux (Sorry Mac users, KVM for that is broken)
- XCP-ng netinstall ISO
- Monitoring DISABLED in the control panel for this specific server
Step 1: Clear the drives if you already have some system installed
** WARNING: This will remove all of the data on the server! **
Due of a bug with software raid setup not wiping drives, you have to boot into OVH’s Rescue distro and clear each drive/nvme with dd to make them appear clean.
root@rescue:~# dd if=/dev/urandom of=/dev/nvme0n1 bs=1M count=2
2+0 records in
2+0 records out
2097152 bytes (2.1 MB) copied, 0.0130416 s, 161 MB/s
root@rescue:~# dd if=/dev/urandom of=/dev/nvme1n1 bs=1M count=2
2+0 records in
2+0 records out
2097152 bytes (2.1 MB) copied, 0.0125005 s, 168 MB/s
Step 2: Booting into XCP-ng installer
Primary way:
Bring up the iKVM window, mount the ISO under Device>Redirect ISO and reboot the host. Be prepared to press F6 to get to the boot manager (Soft keyboard recommended) and select the CD Drive. Once you see XCP-ng GRUB menu and pick your option, go make a cup of coffee or tea.
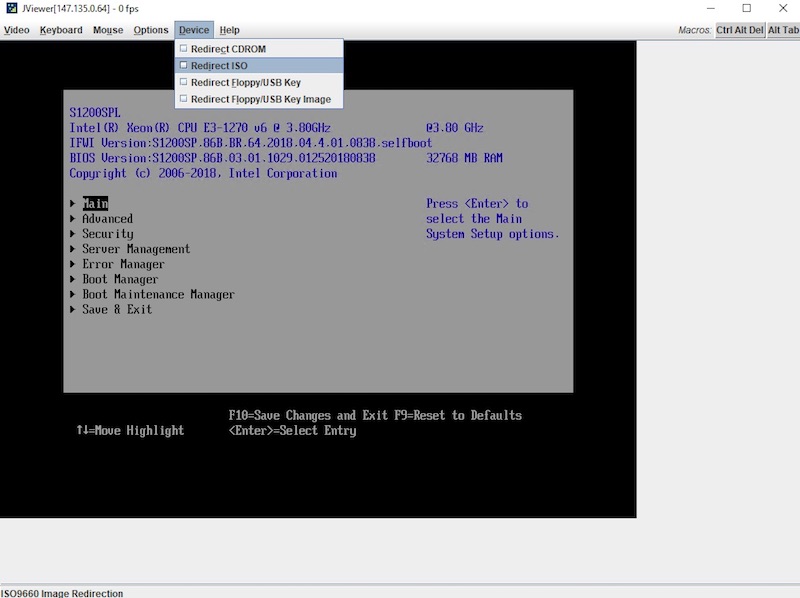
OVH’s ISO redirection is slow and it takes between 15 to 30 minutes for the Netinstall ISO image to start booting. Please be patient while booting the ISO.
Secondary way: OVH uses iPXE on their infrastructure, and if you have another server handy, you can load XCP-ng installer through iPXE.
https://xcp-ng.org/docs/install.html#ipxe-over-http-install
https://github.com/gmasse/ovh-ipxe-customer-script
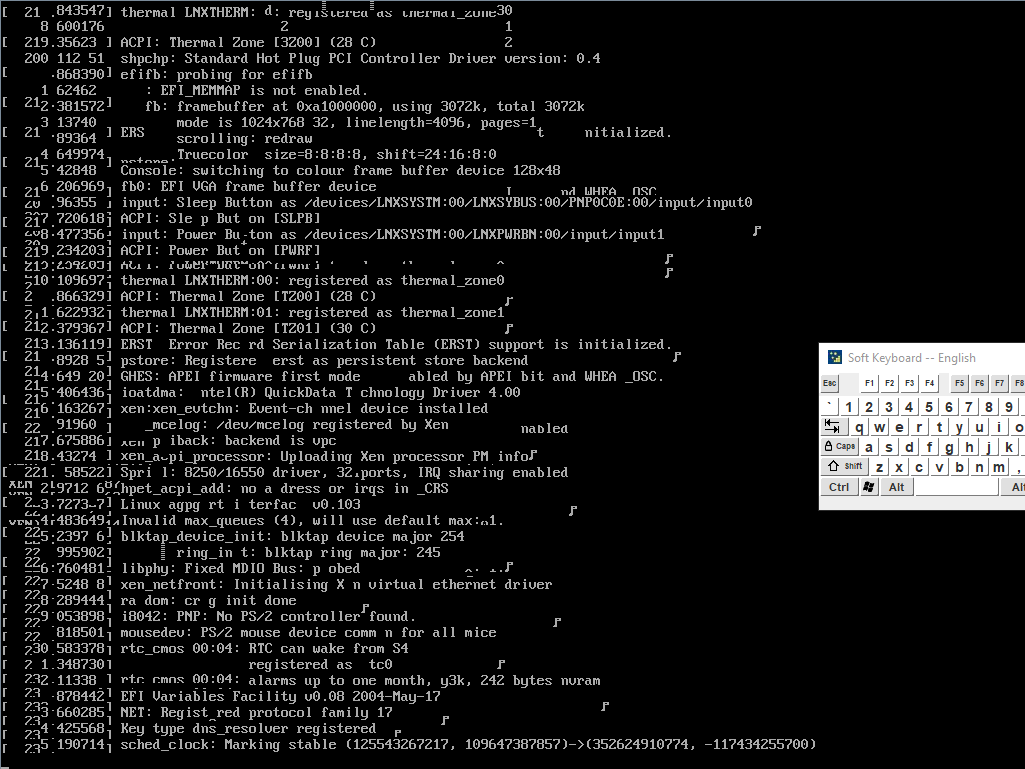
In case you start seeing garbled text or glitching during boot like this, close the KVM, go into the control panel and restart IPMI as your keyboard input is going to not work (or worse ISO redirection stops working randomly and your install media breaks until you restart the session).
If you see “[DEPEND] Dependency failed for XCP-ng installer” during boot or are stuck at “Started Update UTMP about System Runlevel Changes.” with installer not starting:
There’s a bug in XenServer XSO-967 that sometimes causes this to happen and nobody knows why. To get around it:
- Switch to tty2 with ctrl+alt+F2
- Check the status and manually start systemd-udev-settle.service using systemctl start systemd-udev-settle.service
- Run /opt/xensource/installer/init to start the installer. It will display syslog messages during install. I needed to do this on the SYS-LE-4 server SKU even when the bug is mainly caused by HP hardware.
Step 3: Setup RAID
If during installation when you get asked to pick a primary disk, and see something similar to this without you setting up Software RAID yet, YOU HAVE TO clear the drives as mentioned in step 1 with dd or the installation will FAIL and host will try to boot into broken old OS.
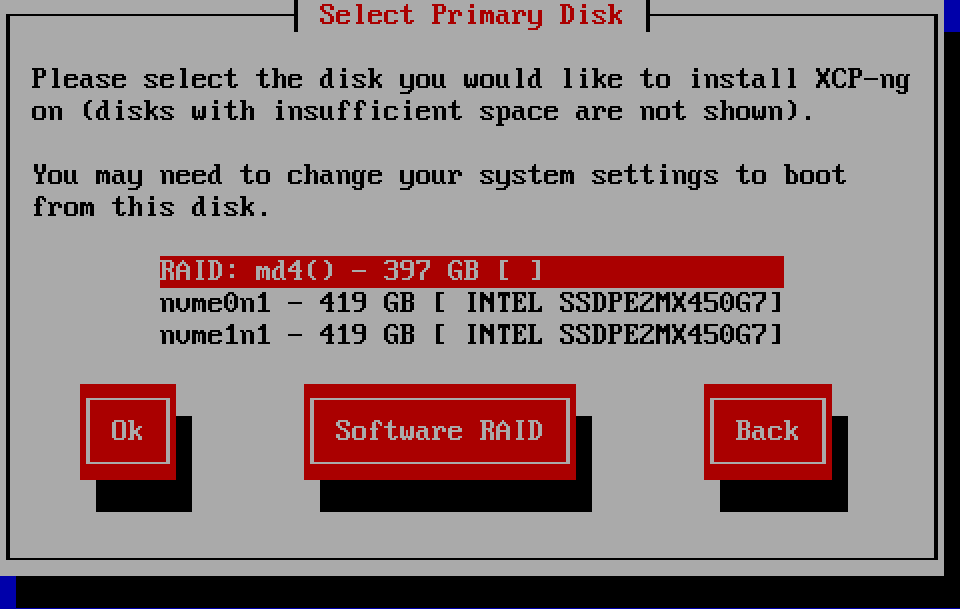
What you should be seeing before setting up software raid
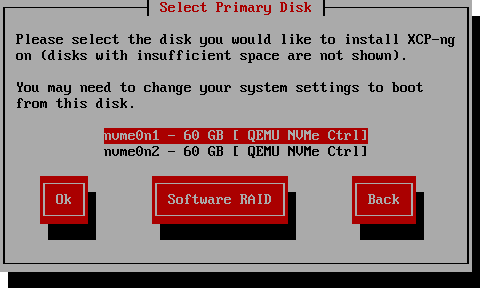
Pick whatever you think is best for you. I went with Raid 1 and LVM/Thick provisioned storage.
If you are stuck on blue screen after setting up RAID: Gracefully reboot the host with CTRL+ALT+DEL and boot back into the installer after its stuck for a while. The raid array will get automatically fixed if something broke during initialization and XCP-ng should automatically go straight to picking VM storage after agreeing to EULA or letting you pick the new raid you created before reboot.
Step 4: Network Setup
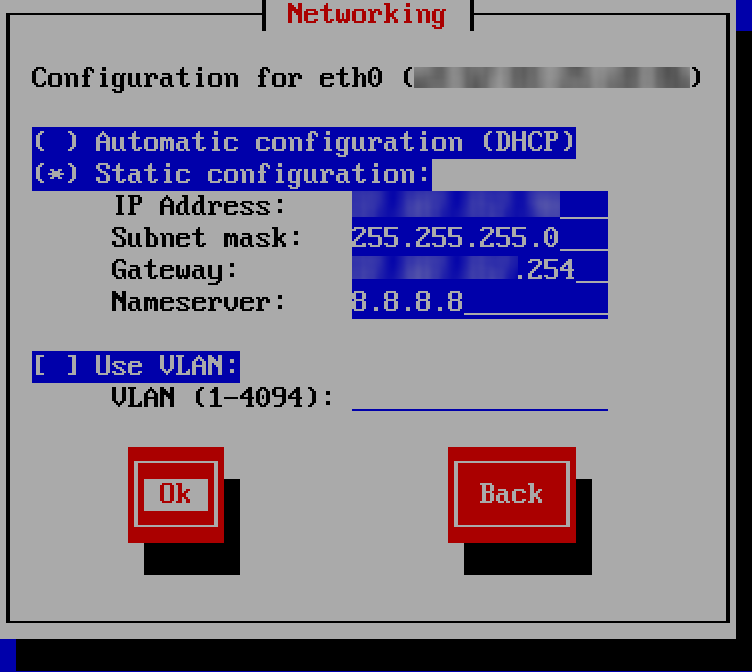
Set it to static configuration.
IP Address: The IP address you received with the server and your reverse points at, NOT one of the additional addresses assigned to you by RIPE/IANA. Subnet Mask: /24 = 255.255.255.0 Gateway: Your IP address with the last ocet being 254 Nameserver: DNS server of your choice.
Do not change the settings for the management interface and keep the eth0 settings if prompted.
 .
.
After this it should be smooth sailing from here and one reboot later you’ll get to enjoy your fancy XCP-ng hypervisor. You now should be able to enable monitoring, as from my experience there was no issue from OVH after I enabled it.