Importing Source Engine models into a 3D program
This guide will teach you the cursed arts of extracting Source engine models and import them into Blender or 3DS Max.
DISCLAIMER
This is HEAVILY not suggested to do. It is incredibly important that you begin your project with a fresh extraction from the game files whenever possible, only utilizing others’ work as a last resort for complicated issues where it does not make sense to invest a large amount of time doing something that’s already been done by someone else.
There are several tools you’ll require: Install the Source SDK and run it at least once (If a model is for SFM, launch SFM’s SDK, if its for L4D 2 run its SDK and so on), install VTFEdit, Crowbar tool and SMD/DMX plugin for your 3D Application of choice.
Tool and plugin download links
VTFEdit (Github archive): https://nemstools.github.io/pages/VTFLib-Download.html
GFCScape (Github archive): https://nemstools.github.io/pages/GCFScape.html
CrowbarTool: https://steamcommunity.com/groups/CrowbarTool
Blender: http://steamreview.org/BlenderSourceTools/
3DS Max: https://knockout.chat/thread/806/1
Maya: https://puppet-master.net/plugins/mesa-2-0/
Cinema 4D R18/R19: https://github.com/xNWP/Cinema-4D-Source-Tools/releases
This guide assumes that you have already the model unzipped or extracted from its archive and ended up with a folder containing “material” and “model” folders that contain VTFs and MDLs. You can use GFCScape for extracting models and files from VPKs (Valve pack archives used with Source engine games after the SteamPipe update) if you are after vanilla models from a source game or a downloaded item in a VPK like a workshop item.
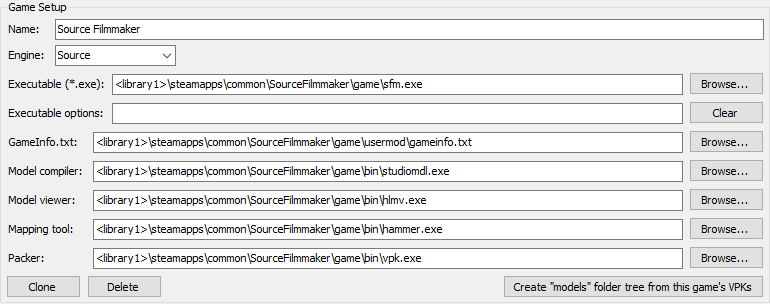
Launch Crowbar and configure your game directories. This is very important. I’ll be using the SFM engine branch for decompiling, as it is the most versatile one when it comes to its StudioMDL’s compiling and decompiling capabilities.
Go to the “Decompile” tab in crowbar and select the MDL file of a model you want to decompile. You can leave everything as it is and press the “Decompile” button. If you set up everything correctly and used the correct engine branch (CS:GO can’t decompile TF2 models due of different Source engine branches and so on), you should end up with a bunch of qc, SMD and possibly VTA or DMX files. Open the QC file to find out which file is the reference model we’re after.
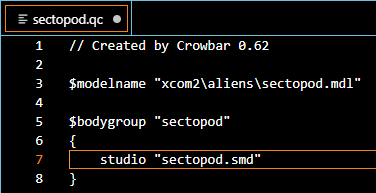
Open up the QC file in your favorite text editor and in this case focus on the $bodygroup, $cdmaterials and $model strings. These define the texture, model name and file locations. In this case, our model is under the name “sectopod.smd”. Some SMD importers include a feature to import the QC file itself, which should import all of the body groups and things such as physical models, but I’d advise against using these features and import the reference SMD file itself (and the body group models later).
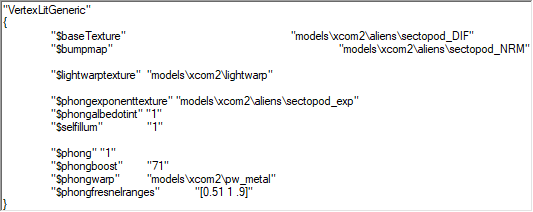
After you locate the textures, you’ll see VTF and VMT files. VTF files contain the textures itself and VMTs contain the texture data. If it isn’t clear which texture is which, open the VMT file. $baseTexture is always the diffuse texture.
Refer to the Valve Developer Wiki for more information what the other stuff means, so you can reconstruct the materials correctly. To export the VTF texture to a regular format, use VTFEdit’s export function. I’d suggest exporting the texture in the TGA file format to retain the texture alpha maps. If you understood anything from this guide and followed it correctly, you should now have a textured model from Source in your 3D application of choice.