Migration of RHEL system to a new server (CentOS 7)
If you ever migrate a CentOS or RHEL based system to a new hardware, or do some hardware change, you might end up seeing something like this after you try to boot the system:
dracut-initqueue[402]: Warning: dracut-initqueue timeout - starting timeout scripts
dracut-initqueue[402]: Warning: dracut-initqueue timeout - starting timeout scripts
dracut-initqueue[402]: Warning: dracut-initqueue timeout - starting timeout scripts
Warning: Could not boot.
Warning: /dev/centos/root does not exist
Warning: /dev/centos/swap does not exist
Starting Dracut Emergency Shell...

Warning: /dev/mapper/centos-root does not exist
Warning: /dev/centos/root does not exist
Warning: /dev/centos/swap does not exist
Warning /dev/mapper/centos-root does not exist

Generating "/run/initramfs/rdsosreport.txt"


Entering emergency mode. Exit the shell to continue.
Type "journalctl" to view system logs.
You might want to save "/run/initramfs/rdsosreport.txt" to a USB stick or /boot after mounting them and attach it to a bug report.
The reason why you’re seeing this is due of initramfs kernel image being build for the specific system its running on, so migrating to a new hardware will cause it to fail to boot. We also need to fix the UUID of the drives and rebuild GRUB2.
Rebuilding initramfs in emergency mode
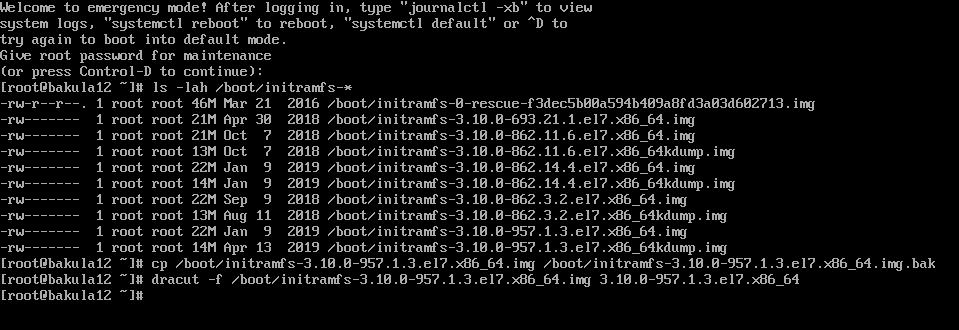
After booting into emergency mode, type your root password and list the initramfs images you have
ls -lah /boot/initramfs-*
Locate the kernel version you’re using and create a backup of it
cp /boot/initramfs-3.10.0-957.1.3.el7.x86_64.img /boot/initramfs-3.10.0-957.1.3.el7.x86_64.img.bak
Then run dracut -f to rebuild the kernel image for that specific kernel. Because we’re in rescue mode, we have to also specify the kernel version.
dracut -f /boot/initramfs-3.10.0-957.1.3.el7.x86_64.img 3.10.0-957.1.3.el7.x86_64

Rebuilding /etc/fstab
If we cloned the drive instead of moving the drive physically into a new system, we have to fix our /etc/fstab. Use blkid to get the partition UUIDs and replace it in the /etc/fstab file. /boot should have the UUID of the boot partition. With LVM, the boot partition is /dev/sda1.


We see that 4f5df47a-116d-4ab0-80cb-da1e8d952c1e is UUID of /dev/sda1 and the UUID of the LVM is Q2WUZi-wyfb-KfaW-1muf-ee9Z-wGL0-doUXZA. Since /dev/sda1 is our boot partition, place the UUID into it.
Rebuilding GRUB2
I’d recommend to have an installer disk handy in case of problems with this step.
If you’re using LVM, STOP! Go to the next section.
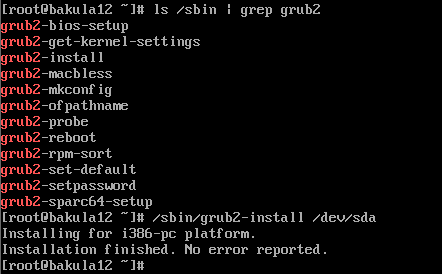
First we have to identify which command is used for grub installation.
ls /sbin | grep grub2
We’ll see that grub2-install is used for that. Run it. After its finished, reboot the system with systemctl reboot. If things break, boot intoa livecd and attempt repairs.

Rebuilding GRUB2 with LVM
If you’re using LVM2, you need to download the live ISO and boot from it. GRUB2 doesn’t like LVM2 that much and will end up bricking it completely unless you do some magic.
After booting from it, go to Troubleshooting and then Rescue a CentOS system and then continue to get the shell.
If you see this, do not panic and continue to the shell.

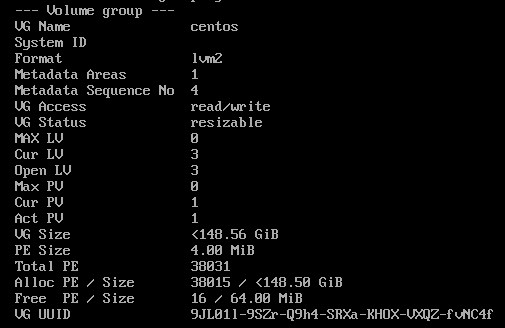
Find the volume group name by executing vgdisplay and make the volume group available by executing vgchange -ay <volume group name>.

After executing lvscan we can see the LVM partitions. In this case we end up with these:
- swap on
/dev/centos/swap - home on
/dev/centos/home - root on
/dev/centos/root
Create a mount point and mount the root LV. Replace centos with name of the volume group, root with the name of the root LV and sda1 with the boot partition.
sudo mkdir /mnt/centos-root
sudo mount /dev/centos/root /mnt/centos-root
sudo mount /dev/sda1 /mnt/centos-root/boot
sudo mount -obind /dev /mnt/centos-root/dev
Change the root of your system.
chroot /mnt/centos-root
Identify which command is used for grub installation.
ls /sbin | grep grub2
We’ll see that grub2-install is used.
Execute /sbin/grub2-install /dev/sda.
Drop out of the shell and reboot. You should see GRUB show up and boot normally.
