Deploying pfSense on a system with a single network interface using VLANs on Dell Wyse D90D7 Thin Client
If you want to create a home lab and want to learn how networking works, but don’t have budget for or have no access to networking equipment from companies such as Cisco, Ubiquiti or Mikrotik, you can go with creating your own pfSense system. As I mentioned in my previous guide, thin-clients are fairly inexpensive and can be turned into a pfSense system with a setup like this even when they have only a single NIC.
You will require to have either a Layer 2 or layer 3 switch for this to work. Layer 2 switch will be enough in this case, as we don’t require for it to do any routing or do intra-VLAN communication. I will be using the Dell Wyse D90D7 Thin Client and Mikrotik RB751U-2HnD’s VLAN functions. I will not be covering the Mikrotik part of setting up the VLANs as they do not comply with best networking practices and will lead to problems.
I could recommend the TP-Link TL-SG108E switch for budget solution for setting up VLANs. The “Unmanaged Pro” actually means its a managed switch. Its weird to set up but VLANs work on it.
Network Diagram of the setup
This document is designed with this network setup in mind:
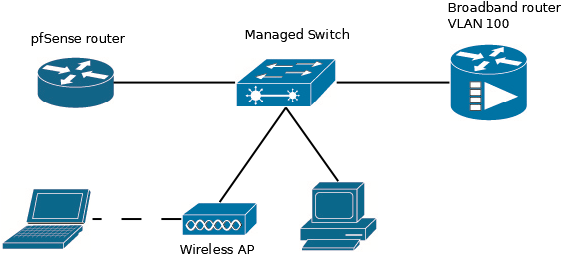
We will be putting WAN onto the last port of the switch and setting it to VLAN ID 100.
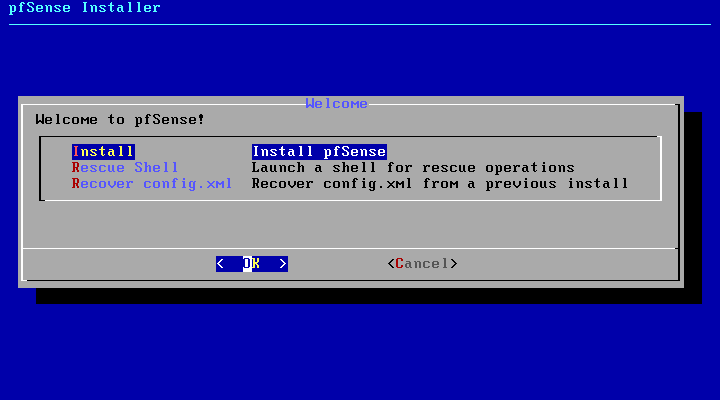
Installing pfSense
Installing pfSense onto the system is fairly straightforward. It is recommended to have only the pfSense box plugged into the switch.
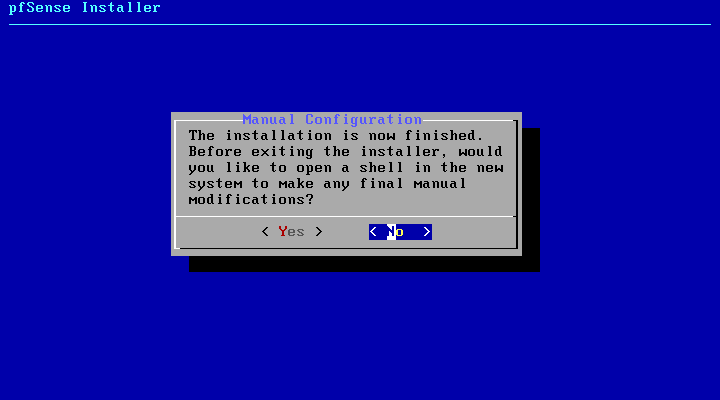
Press “No” on this following screen and reboot the screen.
Setting up VLANs in pfSense
After a reboot, pfSense should pop into its initial interface setup. It will ask you if you want to configure VLANs. Say Yes.
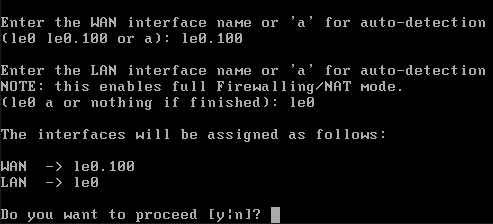
Select the parent interface and then set the VLAN ID to 100. In this case, our interface is is le0. When it asks the same question again, press enter to continue setting up the WAN and LAN interfaces.
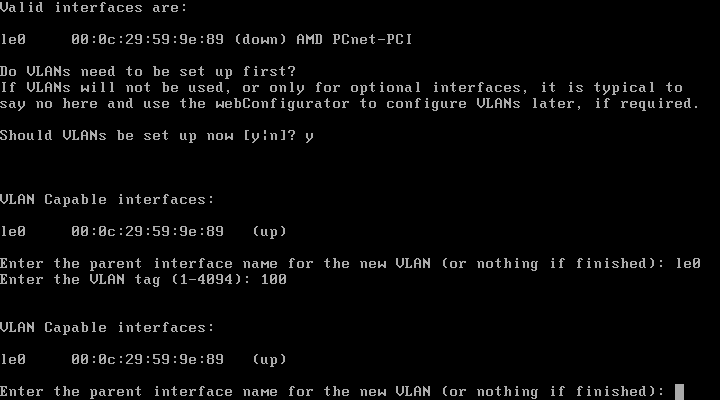
When it asks for WAN and LAN interfaces, set WAN to le0.100 and LAN to le0.
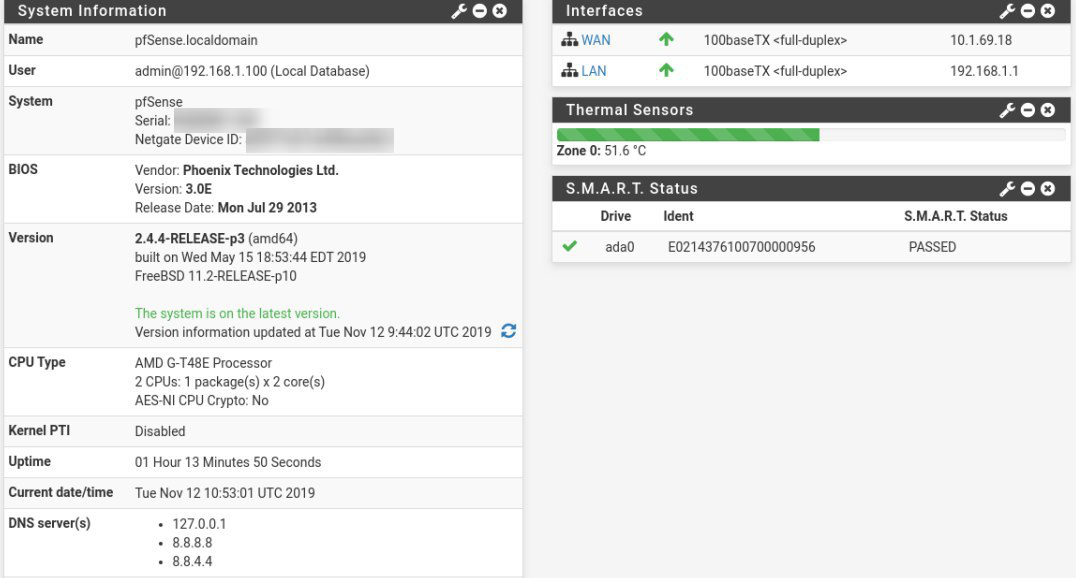
After confirming the settings, you’ll end up with the pfSense welcome screen and get the IP for LAN. Log into the web interface with admin as login and pfsense as password and finish the initial setup.
VLAN setup on switch
In your switch, you should create a new VLAN ID 100. I would recommend putting the WAN cable on the last port of the switch. Set the interface where pfSense is connected as tagged, as it will need to have access to all VLAN IDs. Set the WAN interface on the switch to VLAN ID 100 and set it as untagged. Leave rest untagged, as we don’t want devices on the network access the WAN VLAN.
Each device has its own configuration pitfalls. Be wary of them and ensure you know how to set up VLANs on them correctly.
After this, you can plug in the modem/WAN interface and you should get an IP. After this you should get both WAN and LAN IPs (Or depending on your modem/wan configuration) and you can now proceed to continue setting up your pfSense system to your hearts desires.
High resolution display and Wyse D90D7 specific woes
For some reason, pfSense setup really doesn’t like specific displays or onboard graphics in some systems. You may end up with “Display out of range” messages on your monitor. There doesn’t seem to be any good way of how to fix it, as FreeBSD doesn’t have this kind of issues.
I got around this problem by taking out the 16GB Flash module out of the system, mounting it into a virtual machine and installing pfSense onto it through a VM. A hacky solution, but it works.