Putting your own model into SFM (very simplified)
DISCLAIMER
There’s WAAAY more into putting things into Source than this guide. Use this as a starting point to kick off putting stuff into Source Filmmaker. Keep in mind that Source is over a decade old. As such, there are some severe limitations in place compared to modern game engines. Please run the SFM’s Source SDK at least once before following this guide!
Tool and plugin download links
You’ll require Blender/3DS Max plugins, VTFEdit and optionally Crowbar for compiling models
VTFEdit (Github archive): https://nemstools.github.io/pages/VTFLib-Download.html
CrowbarTool: https://steamcommunity.com/groups/CrowbarTool
Blender: http://steamreview.org/BlenderSourceTools/
3DS Max: https://knockout.chat/thread/806/1
This guide ASSUMES that you’re at least somewhat familiar with either Blender or 3DS Max.
Model compiling
Since were “porting” a model for Source Filmmaker, we can heavily skimp on model properties and just use the bare minimum.
Please be aware that this is not a best practice and the models WILL not work in Garry’s Mod or whatever else.
Source has these following limits: 32 materials, 255 bones, indexed vertex limit at 65536, 3 weights per vertex and StudioMDL culls normalized Weights with balues under .05. Be aware that 3DS Max cannot export an SMD with anything above the Skin in the modifier stack.
After you export your model in the SMD format from either Blender or 3DS Max, it is time to write your QC script to compile it. Sorry for it being in an image format.
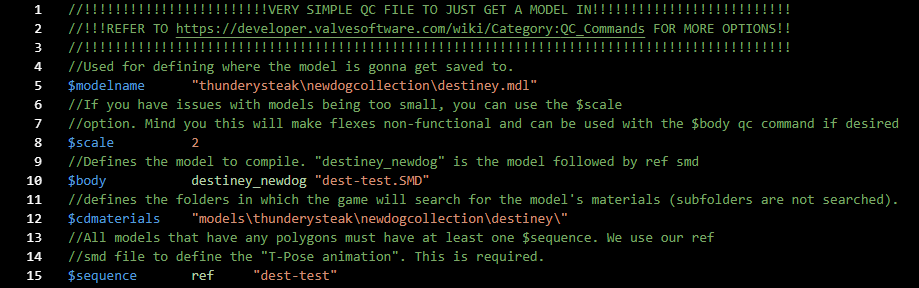
Drag and drop the QC file into studiomdl.bat in the bin folder of SFM or use Crowbar to compile.
Texture conversion
Your texture needs to be in a “Power of two” resolution (64.128,256,512….) up to maximum resolution of 4096x4096. Also make sure your texture has the same filename as the filename you used in Blender/3DS Max for the texture. Use VTFEdit to convert your TGA/PNG to a VTF texture. Use RGB888 (Or RGBA8888 to include texture trasnparency, this will keep the alpha map intact.) After saving the VTF file, go to tools and create a VMT file. Select the VTF file you exported as base texture, go to options and select the VertexLitGeneric shader. Check “Alpha test” to have transparency and save the VMT file. If there exists one already, override it. VTFEdit creates one by default with the wrong shader. If you have a bump map file, you define it in the VMT file as well after converting it to VTF.
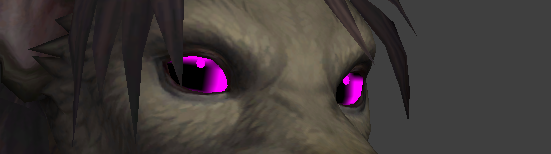
Make sure that your textures and model files are in the correct directories and launch the model viewer and load the model. You’ll most likely be missing materials as indicated with black and pink “missing texture” texture.
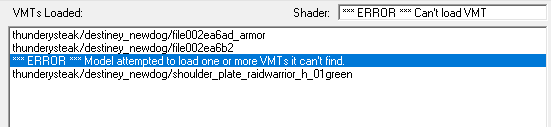

Go to the “Model” tab in HLMV and check the VMTs loaded section. Under “Materials used” you can see the names of the materials the model uses. If you see something like “.bmp” in the drop-down menu, that means you did not assign the textures correctly in 3DS Max/Blender and there was an untextured surface with no bitmap texture attached to it. Be aware that the SMD plugin grabs the bitmap filename name and applies it to the reference SMD file, so make sure everything is named correctly.

For more information, please refer to:
https://developer.valvesoftware.com/wiki/Compiling_a_model
https://developer.valvesoftware.com/wiki/Material
https://developer.valvesoftware.com/wiki/Creating_a_Material