Cinema 4D Team Render Client
Quick Start Guide
You migh be asking yourself “What is Team Render”? Its a way how to distribute your rendering across several computers, or send your scene file onto a designated rendering machine. It speeds up your workflow, or you can send your work to a dedicated server through a web interface for a machine not on your local area network or VPN.
Requirements:
Ethernet LAN connection (Gigabit preferred), all systems in Team render to run the EXACT version of C4D, ALL of your plugins installed for all TR machines, all dynamics and animation being baked before render.
Step 1.
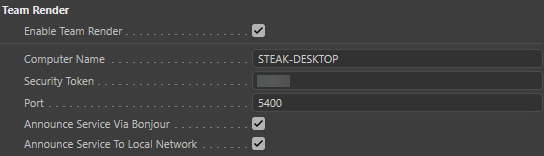
On your main workstation, open preferences (CTLR+E), go to “Renderer settings” and enable Team Render. Announcing service is optional as you will just need the hostname of the computer or static IP.
Step 2.
On your render slave/box, go to your C4D directory and launch Cinema 4D Team Render Client.exe. Note down the computer name, security token and the port, as you will need it.
Step 3.
Open the Render drop down menu, press Team Render Machines and add your machine through the Machine drop down menu. if it doesn’t already appear. You will have to type the hostname or IP of the host. If you did not set up static IP on the host, preferably use the computer name.
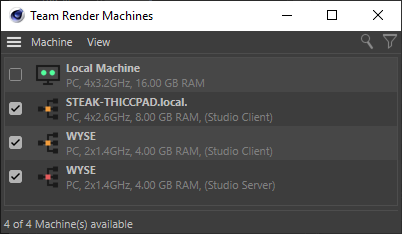
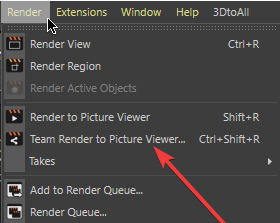
You’re now set for using Team Render. If you want to offload the rendering task onto a different PC (So you can play games or something), just unmark your local machine from TR Machines list. You can use TR distributed rendering in Render Queue or Render to Picture View
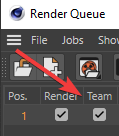
Please keep in mind that in order to utilize TR in Render Queue, you need to select the Team checkmark. Last note is that by DEFAULT, this only functions for only physical and standard C4D Renderers. No ProRender on TR.